5% Discount Coupon: Unknown Tentsile
There are two options when it comes to a dent in your car — live with it, cringing each time it enters your view, or get rid of it. While the latter is obviously the best option, most of us will probably just live with dents and dings since spare money is better spent on the actual functionality of the vehicle. However, there is a way to knock out automobile dents yourself with relatively little cash in the bank.
First off, if you have the dough to spare, you should take your vehicle to a professional auto body repair service to bump out the indentation and repair any paint damage that occurred. Leave it to the experts, as they say, given you do your research and make an informed decision on where to go. This option will make that dent look like it never happened.
But like I said before, most of us would rather spend our spare change on check engine lights and new tires — things that are required to make our cars and trucks stay on the road, not look pretty on it. So for aesthetic auto repairs, you’ll need to take the job into your own hands. Removing a dent or ding yourself can be tricky without professional tools, but with a little DIY spirit, some spare time, and a few minor materials, it’s totally possible.
While smaller dents can be addressed with such home remedies as compressed air and a blow dryer or dry ice, larger ones require a different approach. Dent pullers are one way to go and are widely available from hardware or big-box stores, ranging in skill level and cost, from suction cups under $10 to full OEM dent-removal kits above $300.
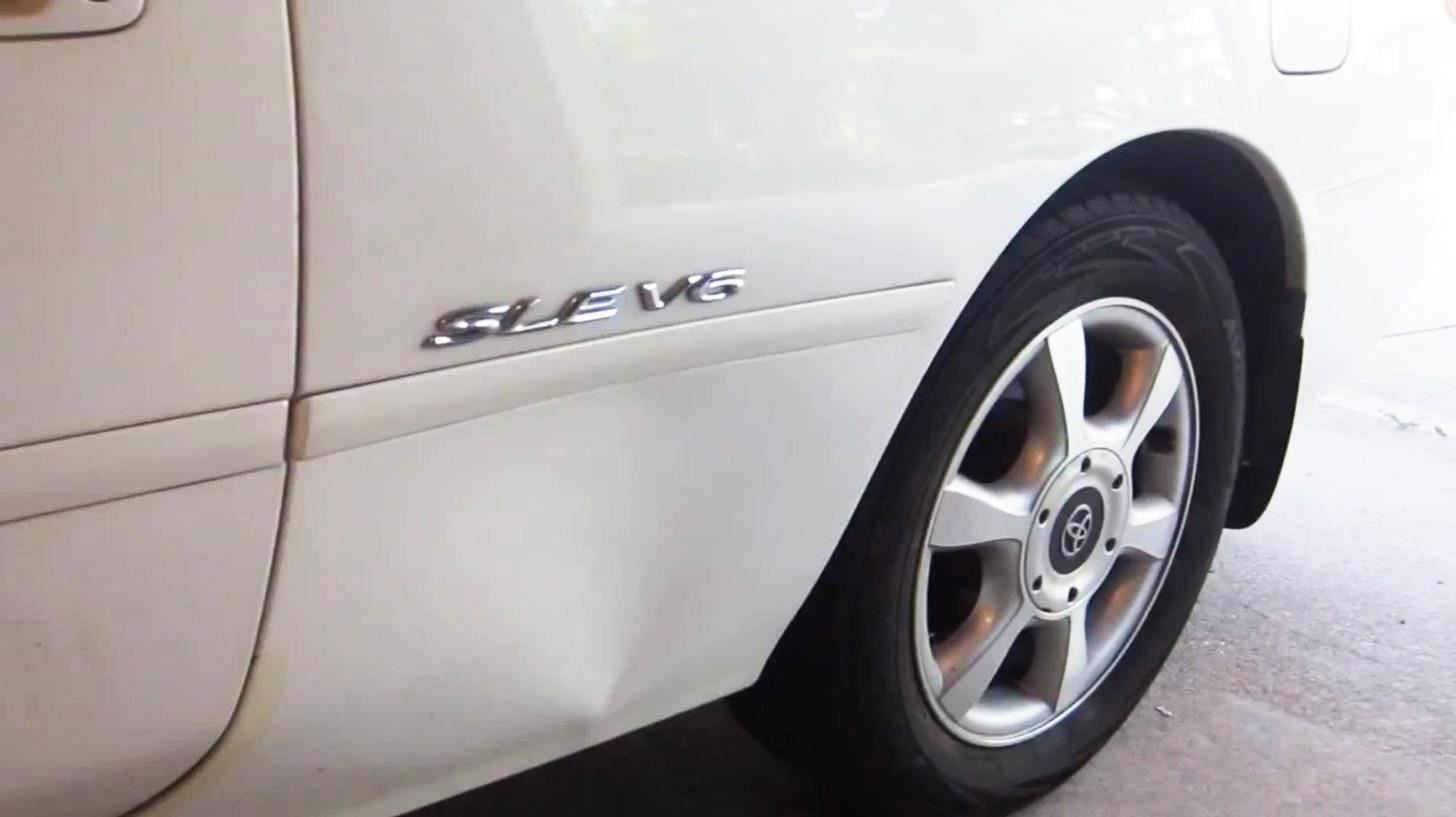
This said, there’s something incredibly satisfying about doing something on your own, and a dent in your car is a perfect opportunity to roll up your sleeves and give ingenuity a try. Using items that are likely lying around your garage or closet, you can tackle that pesky ding yourself as Tom George demonstrates in the YouTube video below, where he takes a hot glue gun, wooden dowel rods, and wood screws to pull out a dent in his 1999 Solara. I’ll be applying the same technique to give a misshapen part of my car a much-needed makeover.
Step 1. Make Your Dowel Grips
Hand saws don’t have much occasion for use, but here you go. Tom started out by cutting around five four-inch sections from a dowel rod, then screwing a wood screw into each side to create grips, like a handle.
For those who don’t have wood screws on hand, bolts can also be used. Simply drill a hole all the way through the dowel section and slide the bolt through.
For the dowel rods, you can readily find them at home-improvement stores like Home Depot or Lowe’s or craft haunts like Michaels. You can also, in keeping with the whole DIY spirit, look around your house and give something old new life again, like that corn broomstick in the corner or that hip wooden rod holding up the kitchen curtains. These too can be repurposed for the project.
Step 2. Prepare the Dented Area
Clean the space around the depression and use a blow dryer to warm up the surface (don’t hold it too close). Not only will this step make the metal more malleable but also give you more time to work with when preparing the dowels with hot glue. To clean the area, soap and water are not necessary. Just make sure it’s free of dirt, which could affect the glue’s adhesiveness if not removed.
Step 3. Glue on the Grips
Using a hot glue gun, apply generous amounts of glue to the flat end of the dowel piece opposite the grips.
Place the knobs around the dented area. There will be trial and error as far as where the dowels are placed. Each subsequent placement will be based on how the dent changes with each pull.
Step 4. Pull Out the Dent
Once in place, let the dowels cool. Don’t rush this part, let them really affix to the car. You want the knobs to grab on to the metal.
Once cooled, you can begin to pull. Again, each pull will provide insight into where to place the dowel next and what technique works best for your particular dent or ding. As an example, you may find better results by getting someone to help simultaneously pull off three or more knobs in a single go versus removing one at a time, covering a greater area.
Step 5. Repeat as Necessary
Keep repeating steps 2 through 4 until you start to see the results you’re after. As for getting a good grab of the area, Tom found that applying the dowel pieces to a warmed-up surface and then twisting the knob on was a good method.
Step 6. Clean & Admire
And that’s the gist of it. Once you’re satisfied with your DIY dent pulling, all that remains is to clean the surface of the dried glue, which should scrape off fairly easily, leaving the car’s paint still in fine shape (as long as there wasn’t any paint damage to begin with, of course).
And that’s the salient point of this afternoon project, in that you don’t really have anything to lose. The items are either already in your home or not too expensive to procure, and if the method works for your car, fantastic! If it doesn’t, you’re really no worse off — just back to square one.


